
How I Edit For Instagram
Something I get asked all the time is how I edit my photos for Instagram. I do try and answer this question in my stories from time to time, but the step-by-step guide I’ve been promising is finally here!!!! This process has obviously changed a lot since I first started my Instagram account, and will continue to change as my aesthetic changes, but as of right now this is pretty much my every day formula.
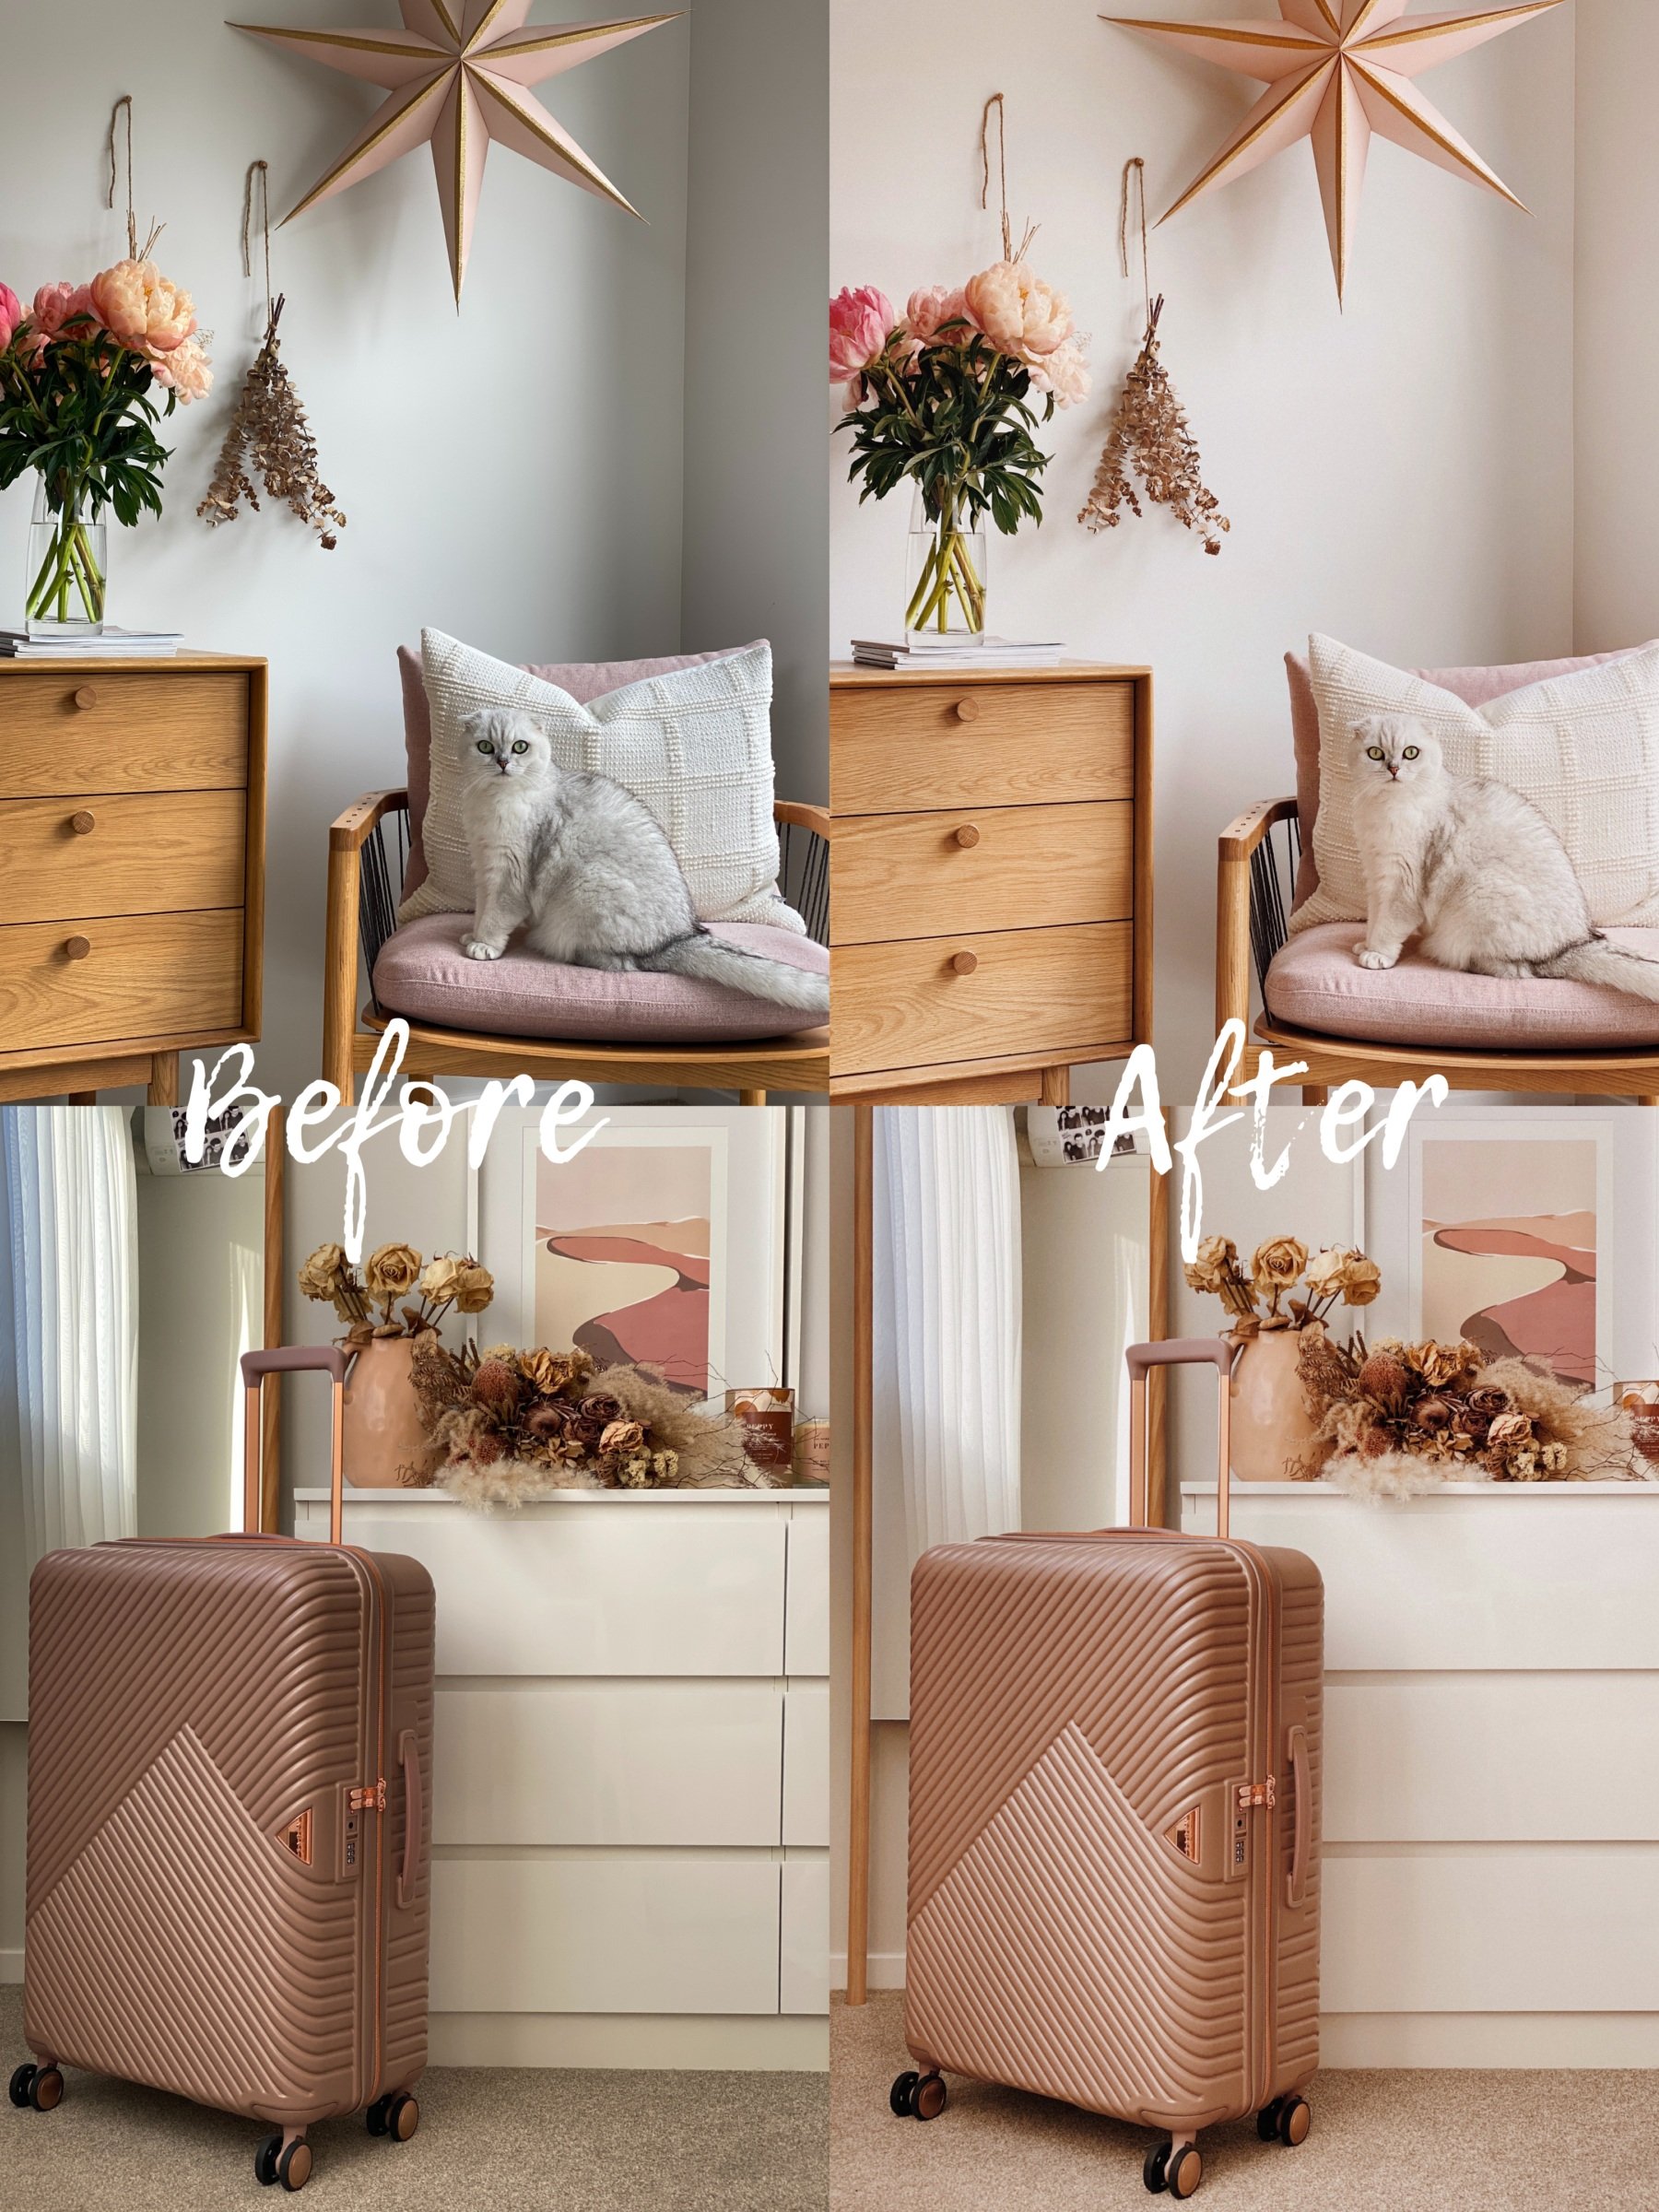
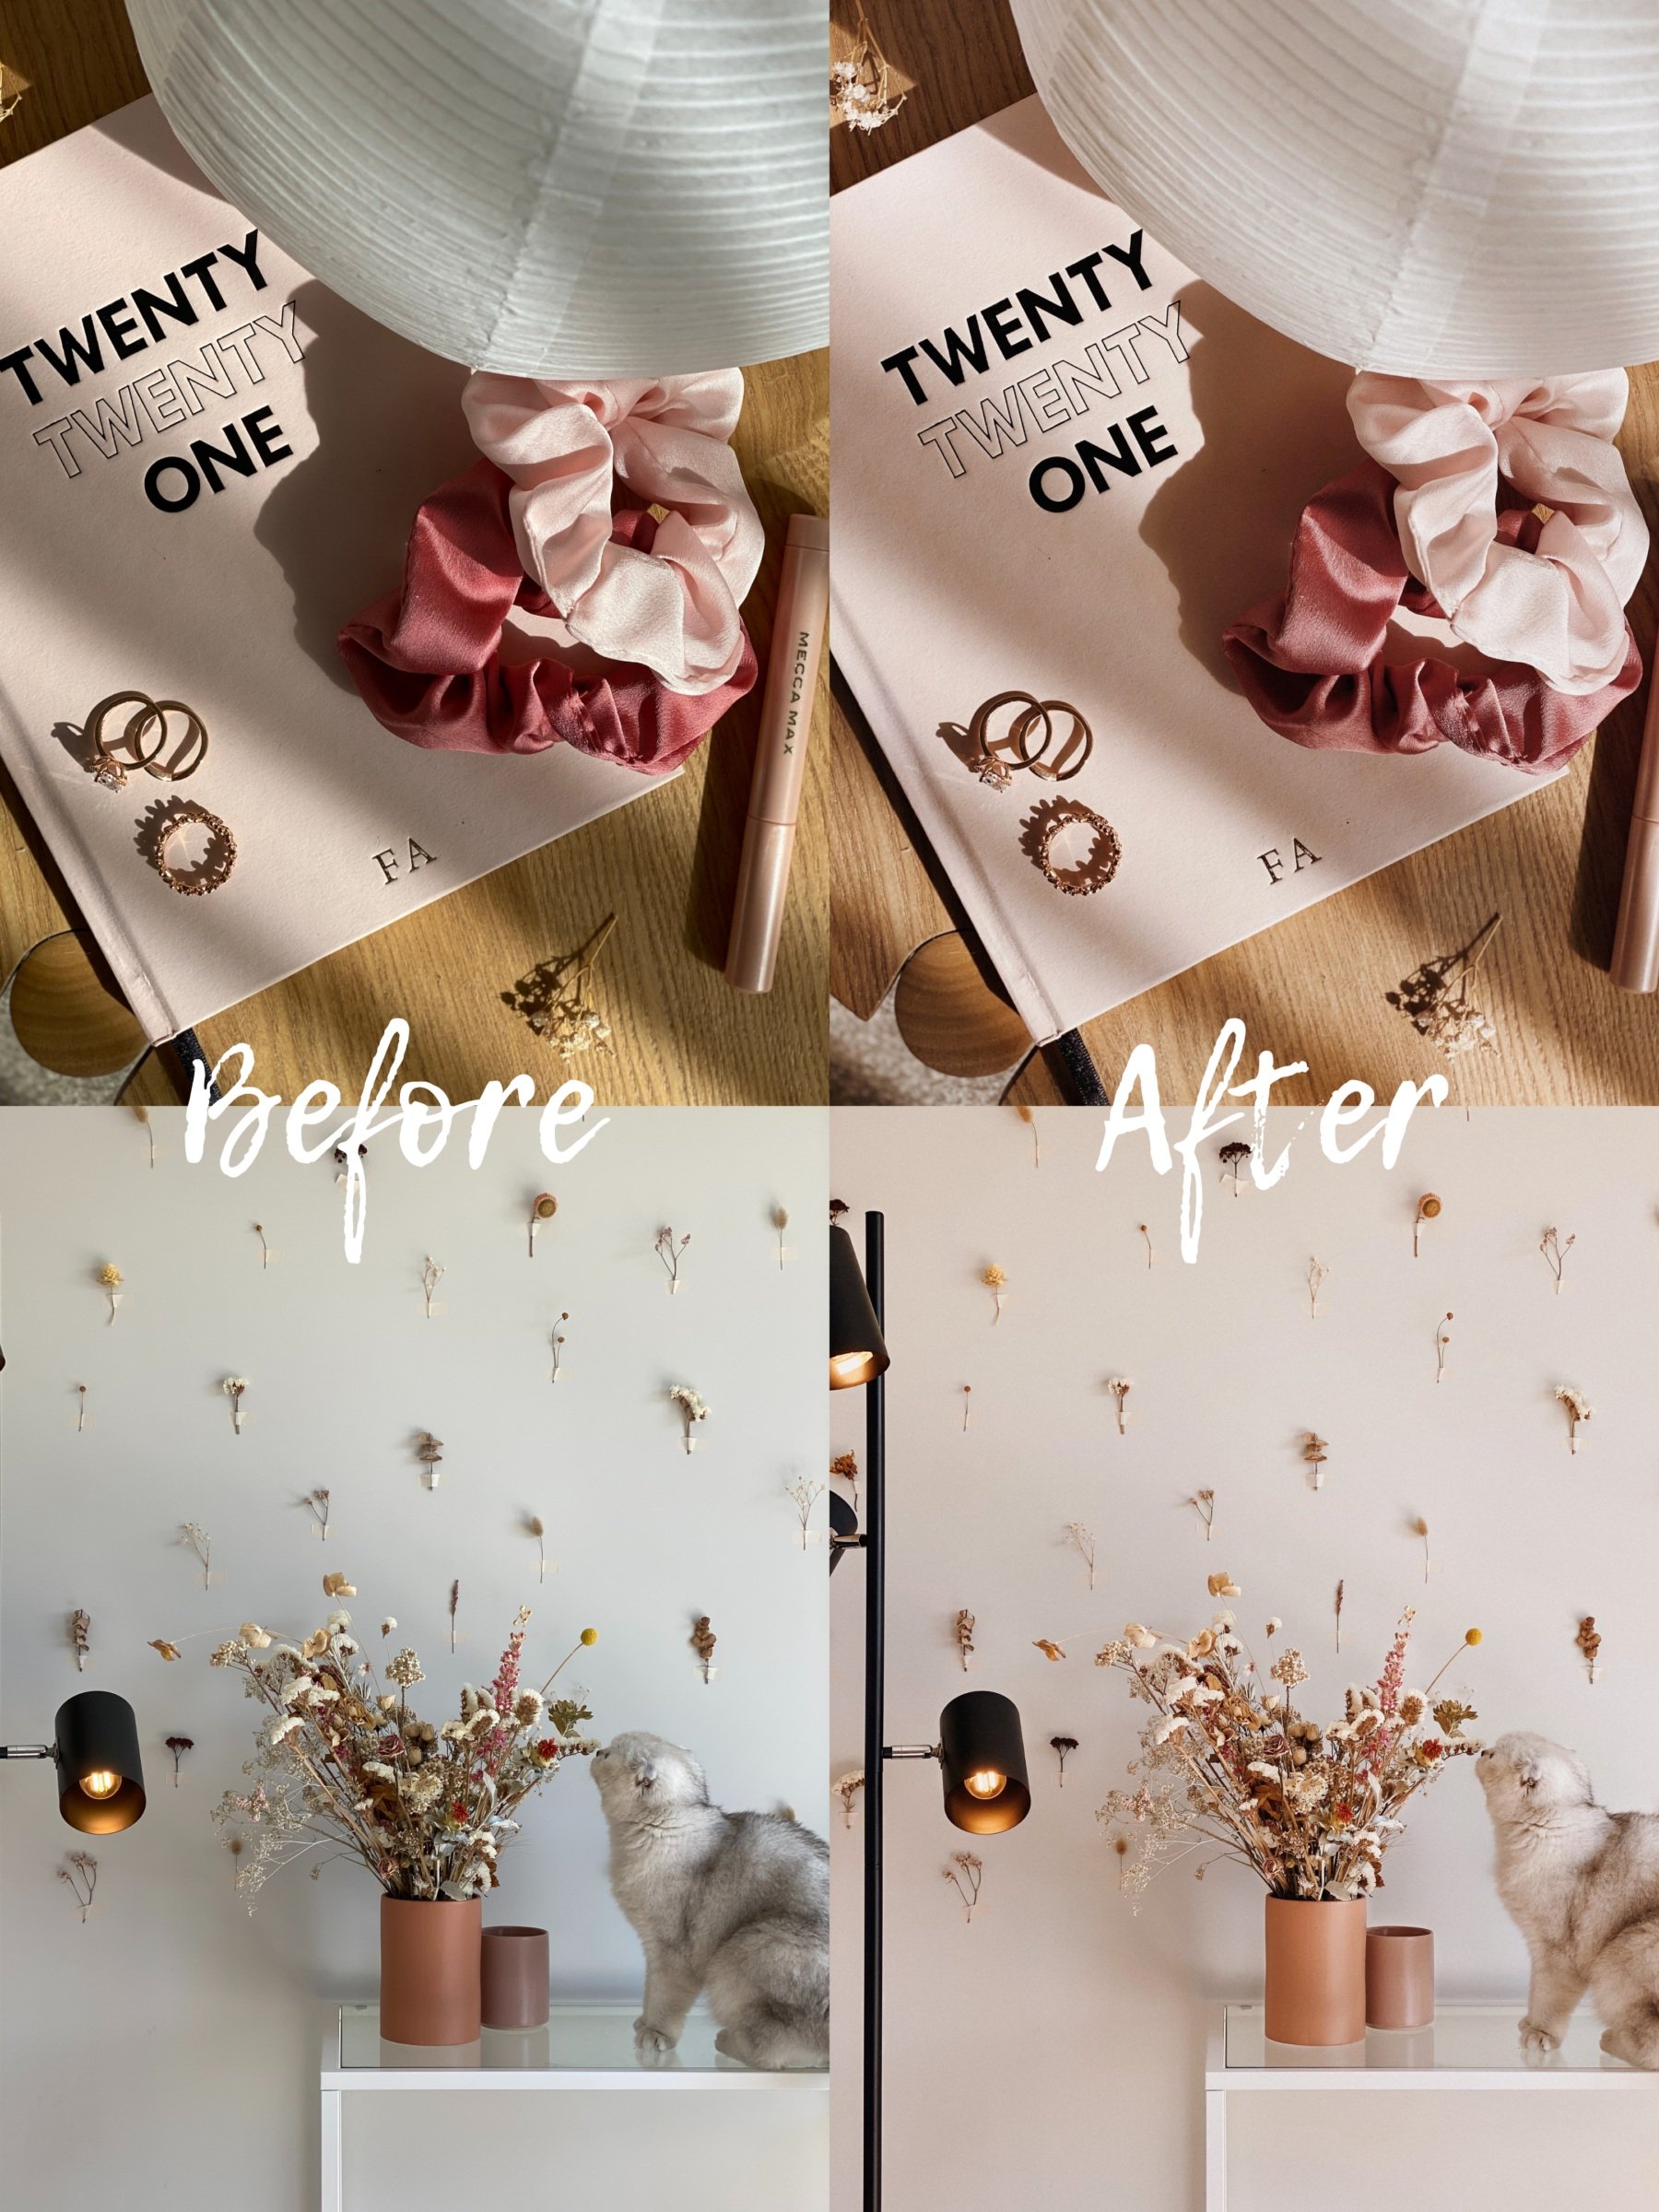
Firstly though, a couple of fun before and afters:
The three editing apps I use for each photo are: VSCO, Snapseed, and Lightroom (all on my iPhone).
Phase One: VSCO
1. Apply filter M5 at 7.0 strength (I find the full 12.0 strength a bit intense).
2. Increase overall brightness if needed (generally not more than +0.8). I used to do this a lot more, but I’ve really gone off the over-exposed aesthetic and tend to keep the lighting more natural these days.
3. Increase contrast (+0.8).
4. Increase saturation (+0.2).
5. Increase white balance (temperature +1.0 and tint +0.8).
6. Use the adjustment tool to straighten any crooked lines if needed.
7. Save!
Phase Two: Snapseed
1. Increase / decrease the exposure in specific areas using the brush tool. This is hands down my favourite Snapseed feature: it’s so easy to brighten up dark corners / tone down over-exposed areas.
2. Decrease the saturation of any areas that are looking too warm using the brush tool. Although I always increase the overall saturation and temperature in VSCO, there are usually at least a few areas that I tone down in Snapseed to keep things looking relatively natural.
3. If the alignment still isn’t quite right, tweak this using the rotate and/or perspective tools.
4. Save!
Phase Three: Lightroom
1. Add some grain (+20) – you can find this under effects.
2. Tweak the colour further if needed. I add my photos to the Preview app before uploading to Instagram, which lets me see how they’re going to look as part of my overall grid. It’s generally at this stage that I decide it needs to be slightly warmer, cooler, pinker, etc – all of which I can easily tweak in Lightroom.
3. Save and upload!
If you want to check out the apps I use, I’ve linked them for you here:
VSCO | Snapseed | Lightroom | Preview
P.S. I do pay a subscription fee for VSCO and Lightroom (100% worth it, in my opinion), but Snapseed and Preview are both free.
Happy editing!